Your guide on a simple EASY way to setup your Kubernetes cluster with your Synology NFS Storage. These steps should replicate for other storage providers using NFS.
Variables to keep in mind in the manifest files below. i.e. if you see a $NFS_IP you replace this with the IP of your NFS device and same with $NFS_PATH.
NFS_IP= 192.168.1.245NFS_PATH= /volume1/kubernetes
Topics Covered:
- Create Manifest Files
- Install and Setup Provider
- Apply Manifest Files to Cluster
- Setup Synology NAS Folder & Permissions
Create manifest files
Create the following files.
namespace.yaml
---
apiVersion: v1
kind: Namespace
metadata:
  name: test-app
pv.yaml
---
apiVersion: v1
kind: PersistentVolume
metadata:
  name: nfs-share
  namespace: test-app
spec:
  storageClassName: nfs-client
  capacity:
    storage: 150Mi
  persistentVolumeReclaimPolicy: Retain
  accessModes:
    - ReadWriteOnce
  nfs:
    server: $NFS_IP
    path: "$NFS_PATH"
pvc.yaml
---
kind: PersistentVolumeClaim
apiVersion: v1
metadata:
  name: example
  namespace: test-app
spec:
  storageClassName: nfs-client
  accessModes:
    - ReadWriteOnce
  resources:
    requests:
      storage: 100Mi
deployment.yaml
---
apiVersion: apps/v1
kind: Deployment
metadata:
  name: blog-example
  namespace: test-app
  labels:
    app: blog-example
spec:
  replicas: 1
  selector:
    matchLabels:
      app: blog-example
  template:
    metadata:
      labels:
        app: blog-example
    spec:
      containers:
      - name: blog-example
        image: busybox
        env:
        - name: POD_NAME
          valueFrom:
            fieldRef:
              apiVersion: v1
              fieldPath: metadata.name
        command: ['sh', '-c', 'while true; do echo logs data >> /output/output.log; sleep 5; done']
        volumeMounts:
          - mountPath: "/output"
            name: blog-example
            subPathExpr: $(POD_NAME)
      volumes:
        - name: blog-example
          persistentVolumeClaim:
            claimName: example
Install & Setup Provider
Install Helm cli commands: https://helm.sh/docs/intro/install/
Run the commands below to add the helm repo and install the provisioner in your cluster.
helm repo add nfs-subdir-external-provisioner https://kubernetes-sigs.github.io/nfs-subdir-external-provisioner/helm install nfs-subdir-external-provisioner nfs-subdir-external-provisioner/nfs-subdir-external-provisioner --set nfs.server=$NFS_IP --set nfs.path=$NFS_SHARE
Apply Manifest Files to Cluster
To apply the configurations in bulk run the following command, this will deploy all four files.
kubectl apply -f namespace.yaml -f pv.yaml -f pvc.yaml -f deployment.yamlSetup Synology NAS Folder & Permissions
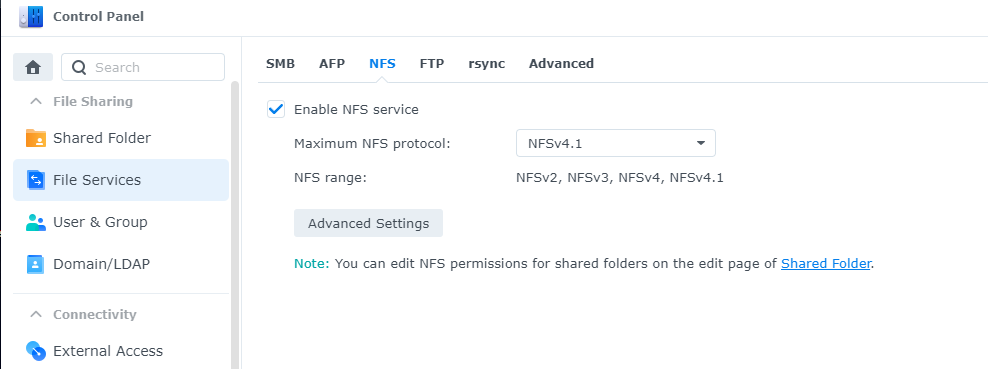
Enable NFS
Login to your Synology NAS device. Navigate to Control Panel and select File Services. In File Services choose NFS. Make sure your “Enable NFS Service” is checked along with NFS Protocol “NFSv4.1” is enabled.
Setup Shared Folder
Login to your Synology NAS device. Navigate to Control Panel and select Shared Folders.
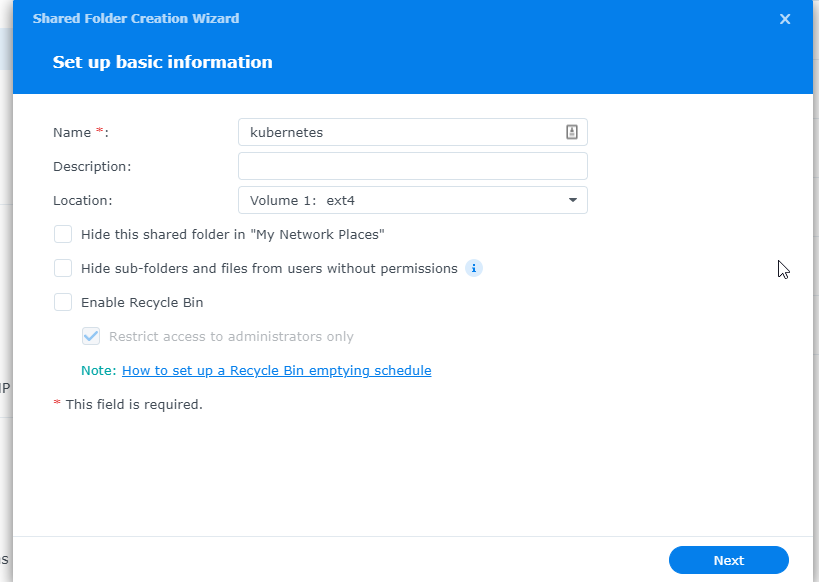
Create > Create Shared Folder
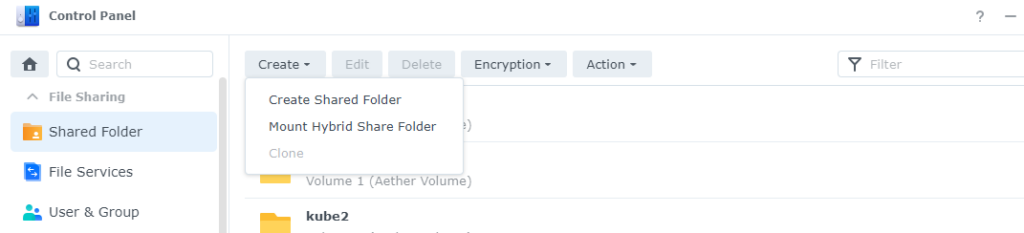
Give the folder a name i.e. Kubernetes, uncheck Enable Recycle bin, select Next.
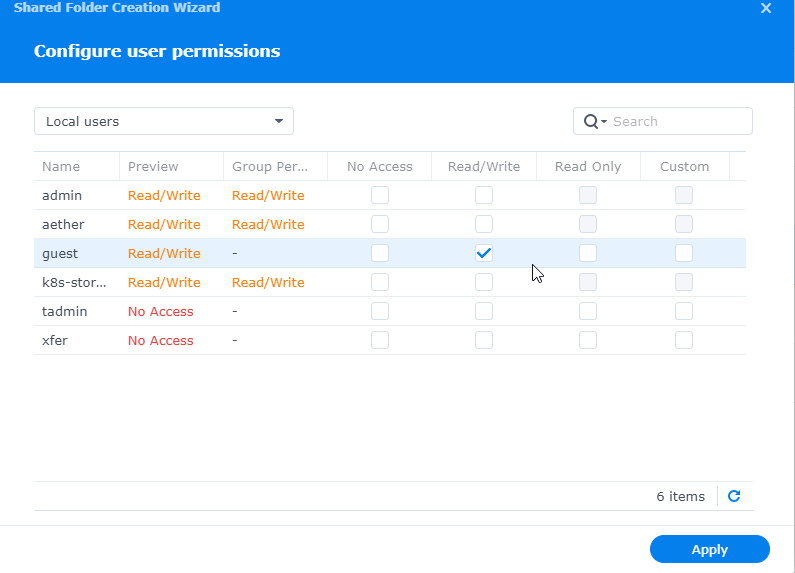
Choose, next three times.
Select Read/Write under the guest account.
Validate Guest Account Enabled
Validate your guest account is not disabled (if so you may need to repeat the steps above for Synology NFS).
Select Control Panel > User & Group
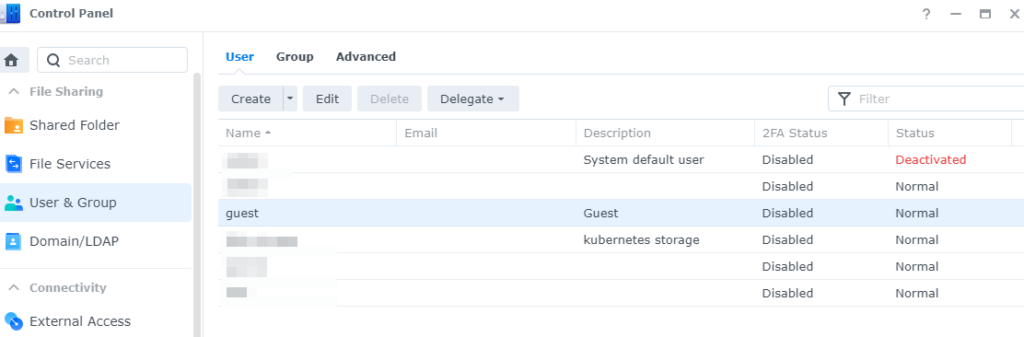
If your guest account does not have a Deactivated status, you are good to go! If you are deactivated click on the checked “Deactivate this account” button, and press Save.

Your NFS Client for Guest permissions should now be live.
Leave a Reply